Showing posts with label stamping. Show all posts

Friday, November 30, 2018

Holiday Coffee Lovers Blog Hop with Joy Clair Stamps

I am participating in the Coffee Lovers Holiday Blog Hop with Joy Clair Stamps! I chose a stamp set from the new release called, "Tea Time".  I chose a cute pile of books to make a delightful book mark!


I stamped the tea cup FIRST on watercolor paper and then put a mask over it, THEN stamped the pile of books with StazOn ink. StazOn ink is waterproof so I can safely watercolor over it and it won't run. Then, I stamped my sentiment.


I watered colored it and then mounted some double sided foil paper on the back by Rinea Foil. The front was gold and the back is silver.


When It was dry I added a tassel and I was finished! Don't forget to sign up for my newsletter before you hop on to the next blog!!


Saturday, October 20, 2018

Joy Clair and Therm-O-Web

I am participating in a Joy Clair Stamps and Therm-O-Web collaboration.

http://joyclair.typepad.com/


I am featuring a new release of Joy Clair Stamps "Christmas Lights". It is a cool background stamp with tiny light bulbs on a string.


I decided to use some of the Deco Foil by Therm-O-Web and foil all my bulbs. I love the shine the foil brings to my projects! I used the Rainbow Foil to achieve all the colored bulbs with only purchasing ONE foil pack.


I took an A2 card and stamped the "Christmas Lights" in black in on the front. I then used the Deco Foil Adhesive to color all the bulbs. I then let it dry for about an hour. The adhesive will be clear and tacky to the touch. Then the fun part begins!!


I took a tiny square of the Rainbow foil and used a section of color to place over the tacky bulb, shinny side UP. Rub gently to get the adhesive to grab hold of the foil and peel back the foil to reveal all the shinny goodness!!


I continued to move my foil around to different bulbs and shifting the foil to a different color on the tiny foil sheet until all my bulbs were covered. I then selected a large Deco Frame and peeled off the release paper to reveal the adhesive and place it on the front of my card. I found a die cut circle I owned that was the same size as the opening I wanted to make and used my Sizzix to cut out the hole.


I then used the previous Christmas release of Joy Clair stamp set, "3D Christmas Poinsettia" to stamp my "Merry Christmas" sentiment inside the card where it would show though the center opening on my card front.


(As a bonus, I took the decorative circle I cut out of the front and added it to the back of my card to jazz it up a bit. I also used a Deco Frame to make it stand out.)


I hope you try the new Deco Foils from Therm-O-Web. They come in some fabulous colors!! A word of caution:  Once you use the foil you may become addicted to it, like I did!!

Thanks for joining me!! Don't forget to sign up for my newsletter for more fun card ideas!!

Saturday, October 6, 2018

Holidays Are Better In Flip Flops!!

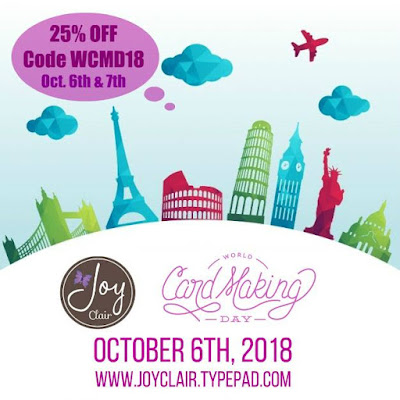
In honor of World Card Making Day, I joined up with Joy Clair Stamps to make this fun holiday card from Joy Clair's new release. Don't forget to scroll all the way down this post to continue on the Around the World Blog Hop!!

http://joyclair.typepad.com/

The stamp set is called, "Penguins Tropical Christmas". There are a lot of fun stamps in this set. I decided to use the penguin and the bikini!!


I used the new stamp set from Joy Clair Stamps called, "Penguins Tropical Christmas". I stamped the penguin over and over, starting with the front row and then covering them with a mask as I continued to stamp up towards the top. I used the MISTI to help me keep them all in a row.


When I was finished I stamped a pink bikini on one of the penguins and colored all the beaks. For some added dimension I added Crystal Effects to the bathing suit to make it shinny and stand out a bit more.


Lastly, I stamped the one of the sentiments from the set onto some bright cardstock and used a die that look like a sun and mounted it on some foam adhesive dots. Mounted the card on pink then black card stock and added my card front to an A2 card base.


Thanks for joining me! Don't forget to sign up for my newsletter to receive all my posts directly in your email inbox the minute I post!


Sunday, August 26, 2018

Joy Clair's New Release "Good Vibes" and a JEEP!!

I am so excited about this new stamp set from Joy Clair's new release. It is called, "Good Vibes".  It happens to have a cool jeep in it and we happen to have a jeep!  My husband will be getting lots of cards made with this set!

 
The card I made today is a great inspiration card for male (or female) especially one who may own a jeep.

 
I used some wonderful Rinea foil on this card for the jeep as well as the embellishments.


I stamped the jeep on the Rinea foil and black StazOn ink. I let it dry. Next, I used a cotton swab to put some Ghost Ink on the headlights and the front window to resemble a glass reflection. ( Let it set for about a minute and then rub it off with a tissue.)  It is so neat to reveal some of the silver under the gold! Cut out the jeep with scissors, carefully.


Next, I worked on the decorations of my card. I cut some banners from silver and gold Rinea foil. (Actually, it is the same paper, gold is on the back and silver on the front.)Stamped my sentiment, "Life is Good" on the smaller gold banner and heat embossed it with some black embossing powder. Be careful or you can wrinkle up the foil with the heat tool. I think you can skip the embossing and just use black StazOn ink but I like to play with stuff to come up with new looks. The heat on the foil makes it wrinkle and even bubble. It is a cool thing if you aren't trying to get a crisp, shinny metal look!

 
I used some texture paper for my card front, added the banners in layers with some tape runner. I only put tape on the top so I could bend the banners up a bit to give some dimension. The paper is actually foil over paper so it bends nicely.  I added a silver band to the bottom of the card and added my jeep with some adhesive dots under the left and right part of the jeep leaving the middle tape free so I could bend it a bit for even more dimension.  Lastly, I added the black enamel dots from a bottle and let them dry.  Glue the front to an A2 card base and your jeep card is done!!


 Thanks for stopping by! Don't forget to sign up for my newsletter so you won't miss a single post!!


Friday, August 10, 2018

Joy Clair's Dancing Donut Background

I can't wait for you to see the new release from Joy Clair!! I used a few stamps to make today's card.

But first, be sure to sign up for my newsletters for more projects delivered to your inbox!

Better card front

I used a fun new background stamp called, "Dancing Donut Background". It is part of Joy Clair's new release which you can view HERE.

I stamped the background stamp on some card stock and trimmed it down to 4 x 5.25 and colored them with markers. I added some crystal accents over the donuts to add shine and dimension. When that dried, I sewed the card panel to a A2 card base using purple thread and a zig zag stitch.

Tag cu

To add some more shine, I used some Rinea Foiled paper to make a cute matching donut tag embellishment. I used the GHOST INK by Rinea and stamped my Dancing Donut Background on the foil. I waited a few minutes and buffed the metal with a napkin with some alcohol on it until the donuts shined though.


Tag cu

I layered the foil tag on top of a pick tag and sewed that tag on top of my card front. I also added a little bit of glossy accents on top of the main donut on the tag and also colored the donut a bit with some brown to have it stand out.


A bit closer

Now to work on the inside of the card!! I stamped a sentiment from another new set from the new release called, "Sprinkled With Love".  I stamped the words with some Stazon black ink. To bring some unity to my card with outside to inside I added some foil. I layered the larger strip with some pink paper to further the continuity.

Sweet 2


Inside strip cu

After doing the inside of the card, you are finished!!

Card front

I hope you enjoyed my card and hope you join me again soon for more ideas!!


Sunday, July 29, 2018

Mother's Day Love and Joy Clair

Today I am using a set from Joy Clair called, "Mother's Day Love".


I decided to make some cute tags for just about any occasion. I colored each tag with Leisure Arts Premium Colored Pencils. 

I used some regular tags and stamped them with VersaFine Clair Nocturne.


Then I colored each with the Leisure Arts Colored Pencils and did some easy shading.


After I colored them all I used a little bit of some glitter pen to add some sparkle to them.


I added some colored bakers twine to each tag and I was done!

Easy project and great to have on hand when you need a tag for a gift.

Hope you give them a try!

Happy Crafting!!
Jen


Tuesday, July 24, 2018

Joy Clair and Christmas in July

I am excited to get going on some Christmas cards!! Yep, time to start working on your Christmas cards so you won't be stressed out come December!!
This set has become one of my favorite Christmas sets! I think you will agree with me.
It is Joy Clair's, "3D Christmas Poinsettia".


I stamped the panel with some of the smaller poinsettias with some VersaFine Clair Nocturne. I colored them with Leisure Arts Premium Colored pencils. I did some shading with the light and dark color of each pencils. I cut the panel and mounted it on some black cardstock and set it aside to work on the card base.


I used a regular A2 card and cut another white panel 1/4 inch smaller for my card front. I positioned the panel on it without tape so I can see where to add my other panels and stamping.


Next, I stamped the large, medium and small poinsettia onto red cardstock and colored them with pencils to add shading. I fussy cut out each flower and layered them together. I bent the petals to make them more 3D and attached a brad to the center to keep them secure.

I then stamped the leaves on some green cardstock and also added some shading with colored pencils, cut them out and rolled them a bit for a more realistic look.


I added the flower to a square white cardstock panel and then mounted it onto a black mat. I set this on my card to see where I want to add my sentiment stamp.

I stamp my sentiment with VersaFine Clair Nocturne and then tie a red ribbon around the white panel. The white panel is added to the card base and then I add the other 2 panels with some foam adhesive.


To add a little bling, I added some jewels to the end of my "Joy" sentiment stamping.


If you are like me and you like lots of "BLING" add some glitter pen to your 3D flower and the poinsettia on the colored panel.

Thank you for joining me for my Christmas in July card. I hope you like it and give it a try for yourself.


Sunday, July 15, 2018

Joy Clair and the New Release

Hi! I'm here with today's blog post using the new release stamp set called, "The Potter" and also some stamps from the new set called, "Born To Sparkle".  Both of these sets are from the Joy Clair release. You can check out the whole release HERE!

Clay open book

First off, pick where you would like to use the stamp set. I chose Isaiah 64:8 but you can also use Corinthians 4:7. They both are referenced with the sentiments in the set.

Clay open book

Stamp with your favorite inks. I chose VersaFine Clair Nocturne. It does bleed through the paper but I plan on doing some other imaging on the back of my page with some layering so it will cover up my bleed thru. You can chose inks that do not bleed as much.

Clay open book

After I stamped all my images I colored them all using my Leisure Arts Premium Colored Pencils.

Clay open book

I tried to shade as much as possible to add some depth to my coloring. I do this by using 2 shades of each color. I use a light and a dark to add in the shading and highlighting.

Clay open book

I also did some "doodling" by writing the word "Clay" in large letters over the bible verses and coloring it with some browns. I then added some of the verses around the letters with a very fine black marker. To add some more interest, I used a glitter pen over the whole word, "Clay".

Clay open book

When I was done I added in some other doodling and some fun stamping with my stamp set, "Born To Sparkle". I used the tiny sparkles in yellow and orange. I think they add some fun twinkling!
The colored pencils are also fun for drawing. I drew in some vines and added some spiral roses to separate all the sections and add interest.

Clay open book

I hope you like my Bible page!! Have fun creating your own Bible pages!!

Until next time, Happy Crafting!!


Wednesday, June 27, 2018

God's Masterpiece with Joy Clair Stamps

Hi! I'm here with a clean and simple card using the new stamp set by Joy Clair called, "God's Masterpiece". You can find this stamp set and a lot more from this new release HERE.

Master4

As you can see, the card is a simple one. I just added a picture of my daughter in the easel frame after I stamped the fun splotches and I was done. (I blurred out my daughter's face for privacy reasons)
Let's make this card!!
  • Pick any size card base. I used an A2 but you can do this with any size, 4x6, 5x7 or the one I did 4.25 x5.5.
  • Stamp the sentiment, "God's Masterpiece" at the top of the card in black ink. (I used VersaFine Clair Nocturne. You can purchase it at Imagine Crafts.)
  • On a scrap piece of paper, stamp the easel and color with some colored pencils or markers. (I used colored pencils from Leisure Arts)
  • Cut out the inside frame and add your favorite person or pet in the opening you made.
  • For the fun part, stamp the paint splotches from the set all over the card front using your favorite colors. I used a lot of brights for my pallet. Get creative and play with color for different looks.
  • Color the letter's in the word, GOD'S with colored pencil to match my stamping. I used Leisure Arts Premium colored pencils. They are so creamy they are like coloring with butter.

Master3
  • To add some dimension and some shine, I added some Glossy Accents over my splotches. Set aside to dry.
  • When dry, add your easel image with some foam tape and you are done! (I used a corner rounder on 2 sides to make the card a bit more interesting, this is optional)

    Master4

    I hope you like my card! Give it a try! For more inspiration subscribe to my newsletter so you don't miss a single idea!