Saturday, April 21, 2018

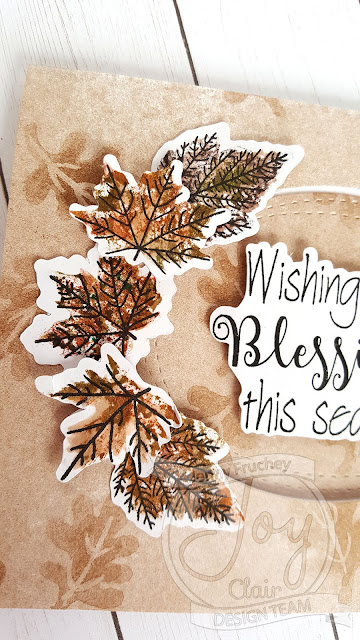
Joy Clair Stamps Fall Leaves

Hi! Today is another easy card I made with my MISTI and Joy Clair Stamps.


When you purchase the "Fall Leaves" stamp set from Joy Clair you can receive the cut file for the stamp set. Open up the file in your favorite cutting program. I used Silhouette and cut it with my Cameo 3.


Cut them out as they are. Don't mess with the size at all. They are sized exactly to cut the stamps. 


There are many ways to stamp the images straight. If you don't have a MISTI, you can leave the die cuts in the papers and use the cut lines to line up your stamp on a clear block. The stamps are clear so you can see though the stamp and is you use a clear acrylic block, you can easily see through them both to line up the stamp to the die cut.

If you have a MISTI, take the die cuts and tape them onto the stamping pad with some temporary tape of just use some tape runner.


 Lay the die cut paper in your MISTI and carefully place your stamps over the cut files and then slowly close the MISTI door to pick up the stamps.


Open up the door, while holding down the stamping pad with your finger, and ink up the stamps. Close the door and your images will be stamped perfectly where you wanted them to be. In this case, my words are lined up on my die cuts.


Next do the leaves. I did the same thing with the leaf die cuts but instead of using ink for the leaves, I used watercolor markers. My markers are the Zig Clean Color Markers.( If you don't have them, use any water-based markers. Color the solid leaves and spritz with a mist of water to get the same effect.)


After you stamp your leaves, use the vein stamp with black ink. When you have 7 leaves, set them aside.

Make your card base. I took a piece of 8.5 x 11 inch piece of card stock, cut in half along the horizon line and then fold your card. This makes an A2 card or a 4.25 x 5.5 inch card. Cut some decorative paper the same size and glue on the card front. Use your favorite die to cut out an oval though both papers. Save the oval that came out, you will use it for the inside of the card.

Take your favorite wording you stamped and use a foam dot to adhere it to the oval you just cut out. Add it to the inside of the card lined up with the opening.


Place a leaf inside to decorate your panel.

Lastly, glue down 3 leaves and pop up 2 leaves going around the oval on the card front and one leaf off to the bottom and you are done!!


I hope this inspires you to make a fun fall leaf card for someone special in your life!
Until next time, Happy Crafting!!
Jen


Thursday, April 19, 2018

Miss Kate Cuttables Halloween Card Challenge and MORE!

This adorable Halloween card doubles as a Halloween decoration! It lays flat so it can be put in an envelope but you can stand it up and add a electronic tea light to make it a decoration.

This is the easel card with the light behind the card front.


This is the card folded down and ready to send.


This is the side view of the card with the added electronic tea light.


This card uses Miss Kate Cuttable's Halloween Witch Frame. I used the standard "easel card" instructions. (You can find them here at Splitcoaststampers.com)
  • Cut out the file to fit the size card you are making. (I made a card 4.5 x 6 so my finished image was 5 inches. 
  • I cut a base card from purple. (4.5 x 12) Score at 3 and 6 inches.
  • Lay the image over the card base and trace inside the image. At the 3 inch fold, cut out the oval with a craft knife. This will be the bottom half of the witch image so you can see the tea light though. 
 
  • Cut out 2 black mats at 4.25 x 5.75inches and 2 decorative papers at 4 x 5.5 inches. Layer them together.
  • Lay the witch image on one set of papers and temporarily adhere it to front of card. 
  • Turn the card over so you can see the back of the card front. Trace the cut out half circle and use craft knife to cut out that section. 
  • Add some plastic between the mat and card base so the light will disperse a bit and shine better.
  • Adhere the front to card base with plastic in the hole. Only add adhesive to the bottom half of the card base so it can fold. Add the image to the papers also.


  •  I used the piece of paper I cut out of the back of the card and adhered it to the folded edge of paper of the card base so it wouldn't be purple showing though when the card was closed on top.
  • Attach the inside papers to the inside of the card.
  • Cut a black rectangle 1 x 3 inches and some purple an 1/8 of an inch smaller. This will be for your sentiment. I used one that would match my design. I also mounted it below the oval opening so it wouldn't show when the card was closed. 
  • Attach with some foam adhesive. 

  • You can stop here but I also wanted my card to stand up further. I added some faux enamel dots. This way, I can either have it on an angle or standing straight up with the battery operated tea light behind it. 


 Add your message in the blank space between the dots and the stamped sentiment or write on the back of the card.

Enjoy!
Thanks for stopping by! Until next time, Happy Crafting!!


Wednesday, April 18, 2018

Joy Clair and Mother's Day

My post today is an EASY Mother's day card using Joy Clair's "Hello Sentiments" stamp set.

We are having a special MOTHER'S DAY EVENT over at Joy Clair's Blog so make sure you check out lots of other neat ideas for Mother's day cards and more!

As for my card, you can whip this up in just a few minutes. It is great when you don't have a lot of free time to make something for your mom but you want to give her something special.


All you need is a punch or die cut machine to cut out some butterflies in different colored card stock. I used a punch I had from Martha Stewart but you can cut from your Silhouette or Cricut. Just cut out 5 butterflies and set aside.


I used Joy Clair's "Hello Sentiments" stamp set and used the "happy" and the "Mother's Day" stamps to stamp my sentiment at the bottom of the A2 card with black ink.  I used my MISTI to get my letters straight.


I glued the butterflies around the message and bent up the wings and I was done. To add more interest, I used a corner rounder to round the corners of my card. That's it!


I hope you give it a try! You can also do this with other die cuts for other holidays: flowers, ghosts, birds, crows, candy corn, pumpkins, snowflakes, ornaments.....you get the idea.

Until next time, Happy Crafting!


Saturday, April 14, 2018

Joy Clair Chain Breaker

Hi, I'm here to show you a quick, fun project using the "MISTI" from My Sweet Petunia and "Chain Breaker" from Joy Clair. I used the chain stamp to make a fun card wrap to keep my pop up Halloween card from opening before the recipient is ready to open it.

 7

To make the card wrap:

  • Take a piece of vellum (1.5 inch x 11 inches) and rub an embossing bag over it. (Embossing buddy, talcum powder or a rosin bag to keep the static down so the stray powder doesn't stick to the outside of the stamping.

7
  • Taking the MISTI lay the vellum in it and arrange the stamps with the part you stamp with facing down.
  • Close the lid to pick up the stamps on the MISTI door
  • Open the lid
  • Ink the stamps with VersaMark
  • Close the lid and stamp the image by pressing down on the lid over the stamps to make contact with the paper with your stamp.
  • Open the lid, tilt the MISTI so you can see your stamped image, make sure it is completely stamped, if not just re-ink and re-stamp.
  • Take the strip out and sprinkle with silver embossing powder
  • Heat with heat gun
  • Place the strip back in the MISTI with half the strip sticking out of the door.
 7
  • Peel the stamp off the door and rearrange on the strip to overlap the previous chain a little bit
  • Close the door to pick up stamp
  • Open door and ink, close door, stamp, remove powder, heat
  • Repeat for other side
  • Now your strip is finished.
 3
  • Take your trimmer and trim the extra vellum off the sides so the wrap is the thickness you would like
  • Make your card (see my blog for more info on how to make my Halloween card)
  • Take your card and wrap your wrap around the card and turn it over, overlap the strips and then tape it shut.
  • Don't tape it tight, you want some play room to get the card in and out without bending the card.
Making card wraps is always fun and an added element to your card. You can make them with stamps, border dies and punches or decorative paper. I am using my wrap to keep my pop up card from opening up when you set the card on the table.


7

7


7

 I hope you got some good ideas from today's post! Happy Crafting!


Monday, April 9, 2018

Miss Kate Cuttables Challenge: Woodland Animal

Today I am doing the Miss Kate Cuttable Challenge. The challenge is making something using a woodland animal. This is what I came up with.


 My school owl bookmark is an easy and fast project for a student or for yourself! I used the School Words Set and the Reading Owl set from Miss Kate Cuttables.


After you open up the Reading Owl set, I lay it all out on ONE mat so I can cut it all in one pass.


I then assemble the owl with all my pieces.


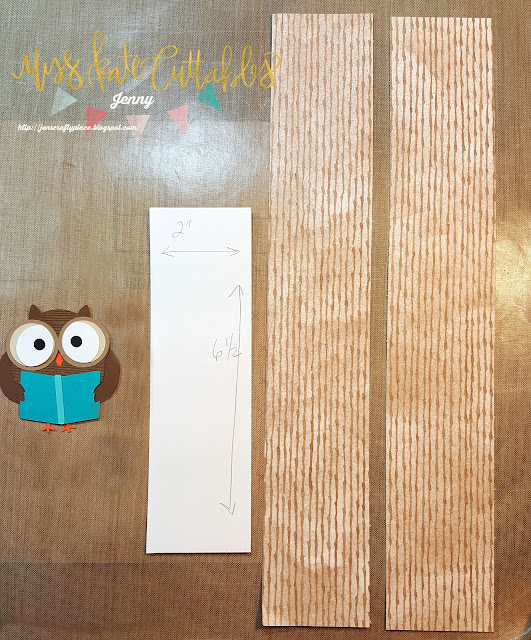
I cut some white cardstock and cut it 2 inch by 6 1/5 inches and cut some decorative paper to cover each side of the book mark base which is the cardstock. I used glue but you can use double sided tape. 


I cut the word "reading" out from the School Words Set. I took away all surrounding papers and used some transfer tape to pick up the word and add glue to the back and adhered it to my bookmark.


That's it! It's ready to keep your place in your favorite book!


I hope you can join us at Miss Kate Cuttable's Blog to join our challenge. Don't forget to post your project!

Until next time, Happy Crafting!!


Sunday, April 1, 2018

Joy Clair Best Buds Stamp Set and Challenge

Joy Clair Stamps is having a challenge. Look at the photos below and make a card with what these images make you think of. I looked at them and it shouted, "RELAX"! I used a little blue and made a card using the "Get Well Wishes" stamp set.

http://joyclair.typepad.com/blog/2018/04/april-challenge-anything-goes.html

This is what I came up with.....


I stamped the cat and the tiny bird from "Get Well Wishes" with my MISTI and used some Stazon ink. I colored them with some colored pencils and cut them out with scissors.

I cut the neat pool out with my Silhouette Cameo 3 using a Miss Kate Cuttable's swimming pool design. After I cut out the pool items, I used a white marker to add in some water lines and layered it on a pieced of decorative green paper, to resemble grass. I popped up the tiny bird on his arm to give it some depth.


To finish it off, I cut the word, "relax" out with some alphabet dies and my Sizzix machine.

Thanks for stopping by!!