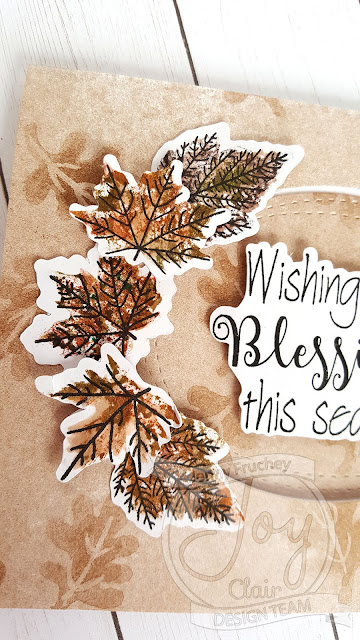
Hi! Today is another easy card I made with my
MISTI and
Joy Clair Stamps.
When you purchase the
"Fall Leaves" stamp set from
Joy Clair you can receive the cut file for the stamp set. Open up the file in your favorite cutting program. I used Silhouette and cut it with my Cameo 3.
Cut them out as they are. Don't mess with the size at all. They are sized exactly to cut the stamps.
There are many ways to stamp the images straight. If you don't have a
MISTI, you can leave the die cuts in the papers and use the cut lines to line up your stamp on a clear block. The stamps are clear so you can see though the stamp and is you use a clear acrylic block, you can easily see through them both to line up the stamp to the die cut.
If you have a
MISTI, take the die cuts and tape them onto the stamping pad with some temporary tape of just use some tape runner.
Lay the die cut paper in your
MISTI and carefully place your stamps over the cut files and then slowly close the
MISTI door to pick up the stamps.
Open up the door, while holding down the stamping pad with your finger, and ink up the stamps. Close the door and your images will be stamped perfectly where you wanted them to be. In this case, my words are lined up on my die cuts.
Next do the leaves. I did the same thing with the leaf die cuts but instead of using ink for the leaves, I used watercolor markers. My markers are the Zig Clean Color Markers.( If you don't have them, use any water-based markers. Color the solid leaves and spritz with a mist of water to get the same effect.)
After you stamp your leaves, use the vein stamp with black ink. When you have 7 leaves, set them aside.
Make your card base. I took a piece of 8.5 x 11 inch piece of card stock, cut in half along the horizon line and then fold your card. This makes an A2 card or a 4.25 x 5.5 inch card. Cut some decorative paper the same size and glue on the card front. Use your favorite die to cut out an oval though both papers. Save the oval that came out, you will use it for the inside of the card.
Take your favorite wording you stamped and use a foam dot to adhere it to the oval you just cut out. Add it to the inside of the card lined up with the opening.
Place a leaf inside to decorate your panel.
Lastly, glue down 3 leaves and pop up 2 leaves going around the oval on the card front and one leaf off to the bottom and you are done!!
I hope this inspires you to make a fun fall leaf card for someone special in your life!
Until next time, Happy Crafting!!
Jen


