Sunday, May 15, 2016

Paper Smooches Guest Designer Call

Oh the places you'll go!!!


This adorable guy is from a stamp set by Paper Smooches called "Smarty Pants". I stamped him on Copic friendly paper with Black Soot Distress Ink from Ranger. I colored my images with Copics but I did not record the colors, sorry! Just choose colors you like. I also added a bit of black cardstock to the back to make him pop off the map paper.
 
I used a Lawn Fawn die called "Say Cheese" for the instant photo frames. I has some discontinued patterned paper I used for my photos. Use any images you would like for your photos. It was fun looking through papers to find stuff to frame. I also used a map paper for my background from a very old paper pad from Paper Pizazz called "Vacation". If you can't find any map paper, use a real map or print one off the internet. It would be fun to print a map of someplace you have visited or want to visit. You can even use real photos of your family in the frames and a map of where you were when you took the pictures! Be creative!
 
For my sentiment I used this quote from a Dr. Seuss book. I just printed it on cardstock and die cut it with a stitched rectangle die. I also added a small border of black cardstock to set it off from the white faux polaroid photos.


I also added a little bit of Glossy Accents by Ranger to my little guy's glasses to resemble the reflective glass. When that was dry, I mounted the whole thing on black cardstock and attached it to a card blank. That's it! Another fun card ready to send to a friend!

I am entering this into the Paper Smooches Guest Designer Call for June. Check it out!

Thanks for stopping by!!

Crayon Rain with Paper Smooches

This easy watercolor card was made to enter in the Paper Smooches Rainbow Challenge.
 
 
I used the set Smarty Pants from Paper Smooches for this cute card. I got my inspiration from my daughter who recently did the crayon canvas thing.  I also used an umbrella stamp from Pink Paislee called " Hello Sunshine". (Unfortunately, it has been discontinued. Just use any umbrella stamp you have or draw one with a waterproof marker.) I masked off part of the professors hand so I could stamp the umbrella to make it look like he is holding the handle.

I then stamped the crayons across the top of the card. I used Versafine ink. It is waterproof and gives great detail to your stamping. Then fun starts! I used Zig Clean Color Watercolor Brush Pens to paint my design.


When the card was dry, I added some Glossy Accents by Ranger to the crayons and the Professor's glasses. I mounted it on black cardstock and taped it on to a card blank and I was done!

Thanks for stopping by!!


Saturday, March 19, 2016

3D Flower Card

 
Today's card is a 3D flower card. Any 3D flowers can be used to make this card. If you don't have any 3D flower dies you can always use store bought ones. I just added some washi tape for the background and to add some dimension to the background I used a Sizzix die.  Dimensional foam was used behind the green border to pop it up a big. I added the sentiment from the Celebrate set by Sizzix. To avoid needing a larger envelope, I cut some of the card front down then added a decorative strip of pink loops cut from the same Sizzix border set. The dots at the top are Perler beads melted down. (I love the glitter looks so I also added some Wink of Stella to my flowers.)
 
 
This washi background is great for any kind of card base. Just add a die cut or Stamped image and you are good to go!


Monday, March 14, 2016

Lisbeth Butterfly Card


Hi Everyone, I'm here to show you how to make this sparkly
3D butterfly card. It is a fast card to make so consider making a few.

Let’s get started!

Take a 4.25 x 5.5 piece of cardstock and use this for your
base. I used purple, you can use any color. Just match your decorative elements
to your selection. I did a fun spray background, you could skip this part to
speed up your card making but it adds another layer of texture. Take a piece of
white cardstock measuring 4 x 5.25. (I used watercolor paints to match my cardstock
choices, pink and purple) Take an old tooth brush and load it with some inky
paint. Run your nail down the bristles and spray some color on your paper. The
spray is light but noticeable. That is why I used watercolor paints, it dries
light. Since I didn’t use a lot of water, the paper did not warp. Set this
paper aside to dry.
 
 
While that layer dries, select a complementary paper color
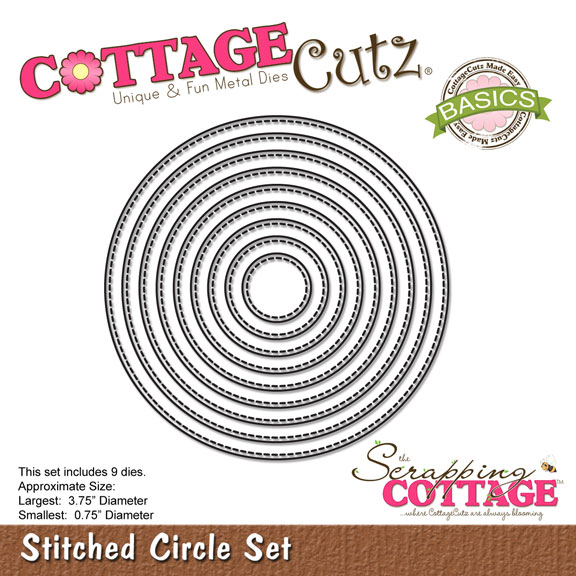
and cut a circle with the Circle Set. (Use the third circle from the outer edge)
Then cut a white circle with the Stitched Circle Set. (Use the fourth one from
the outer edge). I used a pink outer circle with a white inner stitched circle.
Attach them together with your favorite adhesive. Set aside and pick two colors
for your butterfly. I chose purple and pink. Cut a base butterfly using the
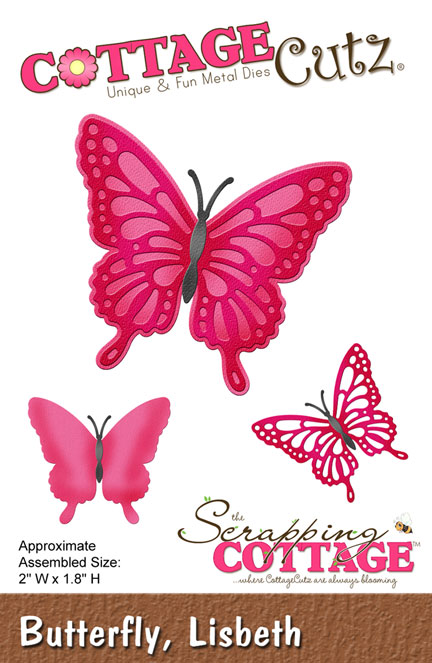
solid butterfly from the Butterfly, Lisbeth set. Cut a detailed butterfly from
your other choice of color (I added some extra sparkle to my detailed piece
with a Wink of Stella pen. This again is optional.). Don’t forget to cut a body
too.  Layer them together and add liquid
glue along the center piece. Do not glue down the wings. That is where we will
get our 3D effect. Add the body on top of the detailed layer as shown. When the
body dries, take a pencil or dowel and curl the top layer of the wings around
it. This will lift the wings and also show the sparkle details.  
 

To get the dimensional wording, I used fun foam. If you don’t
have fun foam you can cut the wording out several times on white cardstock and
glue them together to form the base and attach the top layer with your choice
of color paper. I used fun foam and cut out the words, “Thinking of you” from
CottageCutz Thinking of You set. I cut a set out of pink cardstock and added
some Wink of Stella again, to add some sparkle and make it coordinate with the
butterfly.


Now that the main piece is dry, take some coordinating washi
tape and add some strips down the front of the card as shown. This adds more dimension
without adding bulk. ( If you do not have washi tape tear some strips of
decorative paper and attach. Use what you have on hand. If you want you can add
ribbon, twine, or leave it blank)
 

Assemble the components as shown in the picture. Attach the
white painted cardstock to your base layer.  Layer the butterfly circle piece you created
with dimensional squares to give more drama. Attach the “Thinking of you”
embellishment with your liquid adhesive. Then you are finished. If you would
like more “sparkle” as I did, add some colored sequence randomly around the
card.


Sunday, February 28, 2016

Paper Crafting World's Chicky in Bunny Ears

Hi again! I'm here with an adorable chicky dressing up as a bunny. You can use this for spring or Easter card. I guarantee it will put a smile on everyone's face!

 
Let's make this one step by step!

Purchase your Chicky in bunny ears cut file and open it up in your favorite cutting program. I used Silhouette and my Cameo to cut it out. Choose the file associated with your cutting program. I used svg.


As you can see from the pic above, the file opened up very large. We will size it now. Select the whole image and drag it off the mat. I am right handed so I dragged it off to the right.
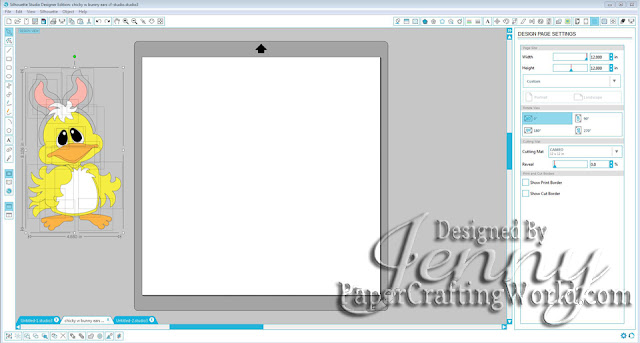


Next select each colored piece from the full image and place them on your mat according to color. The image below is how I set up my mat. As you can see the chick is very large.


We are about to change the size now. If you want an exact size of how the chick will be when assembled you can select the chick while he is all together and resize him or do it as I did in the next step. After I placed all the pieces in colored groups I "selected all" the pieces on the mat and then grabbed the bottom right arrow and moved the shapes to the desired size. I was looking at the eyes. I wanted the eyes to be approximately 1/2 inch.
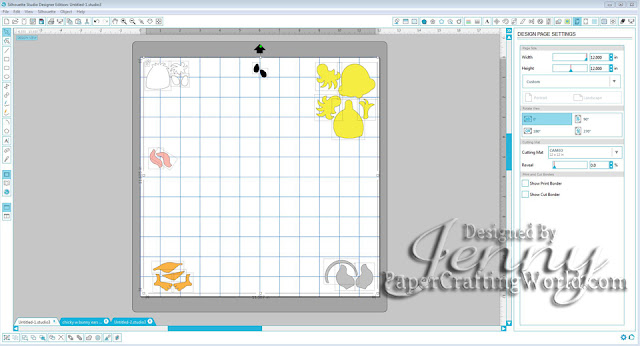


I then rearranged them on the mat. Now, time to set up the real mat with my papers. This way you only have to cut ONCE.  If you are more comfortable cutting one color out at a time, then you can remove all pieces once again to the right of the mat and place one color group on at a time and cut. I like to do it all at once. I can also use up my scrap paper this way. Just make sure you follow your grid lines to know where to place your papers.  My mat is old so I have to tape my papers on so they don't move while the cutter is cutting. I use a low tack painters tape I bought at my local dollar store.


Load your mat into your cutting machine and cut out your file. Don't forget, if you are using the Cameo you have to have your machine set on "CUT" in order for the machine to find your cut lines. This is also where you set your material, blade depth, pressure and other cut settings.


Once your pieces are all cut out, arrange them on some scrap paper to get ready for coloring your edges. This step is optional but it does add depth and dimension to your project without adding bulk. The chick can be assembled without this step.


I used Dew Drops to ink my edges but you can use pastels, chalks, Distress inks, whatever you have on hand is fine.


After all the pieces are colored, time to assemble the little guy. I used glue. You can use tape but glue is more forgiving if you get a piece in the wrong place. With glue you can move the pieces after you place them together, with tape once you place it down, it's stuck.
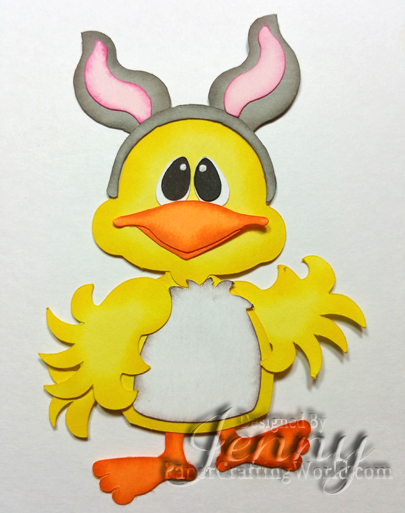


Now that our chick is complete, we can assemble the card. I used Lawn Fawn Small stitched Rectangle Stackables , Large Stitched Rectangles Stackables and Stitched Hillside Borders.

My card is 4.25 x 5.5. This is a standard A2 card. I used an orange starred paper from MultiCraft that I purchased at my local dollar store. Any decorative papers will work. Just use what you have. If you want more of an Easter feel, use paper with Easter eggs! I cut this layer to the size of my card front of 5.5 x 4.25 using the stitched die. Next, I cut my striped paper from another pad I purchased from my dollar store called Glimpses by Signifypink. This measures 5 x 3.75 again using a stitched rectangle. My last white cardstock layer was cut using stitched rectangle 4.5 x 3.75. I ran this white piece through my Sizzix Big Kick using a cloud embossing folder by Darice.


The ground was cut using the Lawn Fawn Stitched Hillside Borders using a scrap piece of green printed paper approximately 3 x 1.25. Adhere the  hill to the bottom of your white paper. Attach all the papers according to size like the image above.  Add the chicky on the hillside. I used foam adhesive to pop him up a bit. Lastly, I added some faux enamel dots to the bottom right of my card for a splash of color!

Thanks for joining me! I hope you like my Spring card. Give it a try and let me know how yours comes out! Post some pictures in the reply box, I would love to see how you embellished your card!!!

Click here to follow my blog with Bloglovin.

Friday, February 26, 2016

Guest Designer for Miss Kate Cuttables

This is Jenny Fruchey from Jen's Crafty Place. I am very honored to be the Miss Kate Cuttables Guest Designer for today!

I don't know about you but anything Rudolph brings back such wonderful childhood memories for me. Since Christmas is over, I have a great winter card for you! Snow Yeti is that wonderful Abominable Snowman from Rudolph. It is a great addition to scrapbook pages or cards but I decided to make HIM my actual CARD. If you don't know how, just follow along!


1. Open the file in your favorite cutting software. I used my Silhouette Cameo and Make The Cut.


2. Select the WHOLE file and pull the bottom right handle to size the yeti to 5.25 inches.


3. Select the solid yeti. In the pic above it is the green image. Move all items off the cutting mat and move the green yeti on the mat. Select "copy" and "paste in place" then "flip". Without moving it, use your "up arrow" on your key board to move the new copy of your yeti up until just the top is overlapping with your original yeti.


4. Select the two yetis and use the "weld" key to weld both snowmen together to form the base of your card.

 
5. Cut the card base out with white card stock and cut all other pieces out in their respective colors. (One light blue, one grey and one white.) The Yeti file is color coordinated but if you need some reference use the jpg included in your file purchase. (You do not need to cut out the Christmas trees or the snowflakes for this project.) I grouped each item by color so you can cut them out at the same time. Either arrange each color group on a mat and cut or arrange each group on a section of the mat and cut all together.
 
 
6. Add some black paper behind the light blue face. (The holes for the mouth and eyes.)
7. Glue all layers together. Start with the white base, add the light blue layer with the black added to the back, next the grey layer and last the white.
8. Add the eyes, nose, teeth and tongue and you are DONE!

 
This technique for making the base card can work for all kinds of files. Have fun playing with your images! Use them for more then just embellishments for cards; use them AS your cards! People enjoy getting special shaped cards. Give it a try!


Click here to follow my blog with Bloglovin.

Tuesday, February 16, 2016

Hello Butterfly Card

I made this simple card using a sketch from Freshly Made Sketches. I just found this neat website and decided to make a card using their card sketch 223. I didn't get it finished in time to post to their website for judging but I love the unique sketches. Using a card sketch is a fast and fun way to put a card together without having to come up with a layout. The hard part is done for you! Playing along with their challenges is also fun!
 
 
Let's make this easy card!
 
I first took some watercolor oil pastels from Prima and scribbled it on some scrap paper. I used an old toothbrush dipped in water and ran my finger across the bristles. I did this with the pink and green pastels. I splashed it on a A2 size card panel. There is hardly any water so no need to use watercolor paper. I let it air dry. You could use a heat tool to speed up drying time but it only took a minute or two to dry. While it was drying I gathered up the rest of my supplies.
 
 
I used some washi tape I had in my stash and made the "X" called for in the sketch. Next, I cut out a stitched circle with my CottageCutz Stitched Circle die. I used one aprox. 2.5 inches. (The 6th one from the center) I did this from some white scrap paper I also had in my stash. Then with the Butterfly, Lisbeth die from CottageCutz, I cut out the bottom layer from some soft green apple cardstock scrap and I used a pink polka dot paper scrap for the detailed top layer.  I adhered it with liquid glue and added a soft green apple cardstock body for my butterfly. I bent the top layer of the butterfly around a pencil to achieve the dimensional curved shape. I glued my finished butterfly to my stitched circle. I added it to my card above the "X" with foam squares for dimension.
 
Lastly, I cut a sentiment out with the same pink polka dot paper and fun foam for the base. I adhered them together and added that to my card under the stitched embellished circle. I still thought it needed something so I cracked into my stash of sequins and added some pink, green and clear ones in random spots I thought needed some sparkle.
 
That's it! It's done! I hope you enjoyed making this card with me and please feel free to email me pictures of your creations you made from this tutorial. (jenny@romeotheatre.com)
 
Until next time! Happy card making!!

http://www.scrappingcottage.com/cottagecutzbutterflylisbeth.aspx