3D butterfly card. It is a fast card to make so consider making a few.
Let’s get started!
Take a 4.25 x 5.5 piece of cardstock and use this for your
base. I used purple, you can use any color. Just match your decorative elements
to your selection. I did a fun spray background, you could skip this part to
speed up your card making but it adds another layer of texture. Take a piece of
white cardstock measuring 4 x 5.25. (I used watercolor paints to match my cardstock
choices, pink and purple) Take an old tooth brush and load it with some inky
paint. Run your nail down the bristles and spray some color on your paper. The
spray is light but noticeable. That is why I used watercolor paints, it dries
light. Since I didn’t use a lot of water, the paper did not warp. Set this
paper aside to dry.

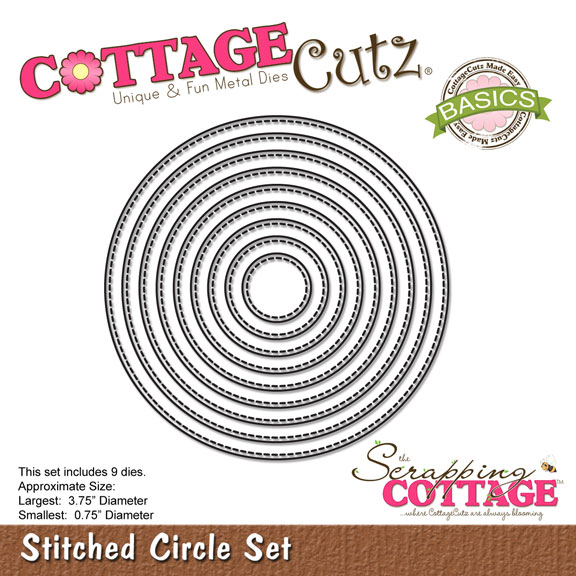
and cut a circle with the Circle Set. (Use the third circle from the outer edge)
Then cut a white circle with the Stitched Circle Set. (Use the fourth one from
the outer edge). I used a pink outer circle with a white inner stitched circle.
Attach them together with your favorite adhesive. Set aside and pick two colors
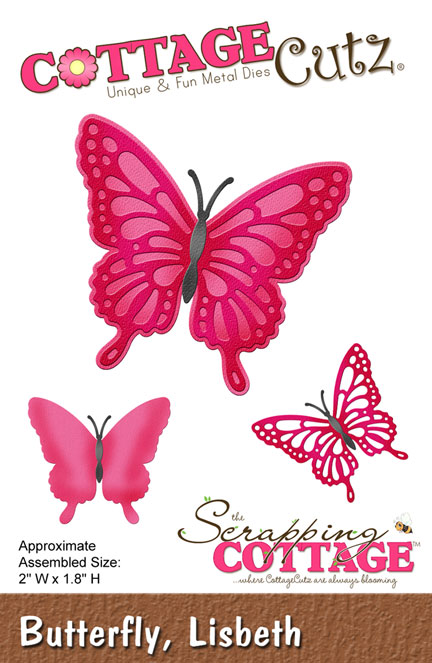
for your butterfly. I chose purple and pink. Cut a base butterfly using the
solid butterfly from the Butterfly, Lisbeth set. Cut a detailed butterfly from
your other choice of color (I added some extra sparkle to my detailed piece
with a Wink of Stella pen. This again is optional.). Don’t forget to cut a body
too. Layer them together and add liquid
glue along the center piece. Do not glue down the wings. That is where we will
get our 3D effect. Add the body on top of the detailed layer as shown. When the
body dries, take a pencil or dowel and curl the top layer of the wings around
it. This will lift the wings and also show the sparkle details.
Then cut a white circle with the Stitched Circle Set. (Use the fourth one from
the outer edge). I used a pink outer circle with a white inner stitched circle.
Attach them together with your favorite adhesive. Set aside and pick two colors
for your butterfly. I chose purple and pink. Cut a base butterfly using the
solid butterfly from the Butterfly, Lisbeth set. Cut a detailed butterfly from
your other choice of color (I added some extra sparkle to my detailed piece
with a Wink of Stella pen. This again is optional.). Don’t forget to cut a body
too. Layer them together and add liquid
glue along the center piece. Do not glue down the wings. That is where we will
get our 3D effect. Add the body on top of the detailed layer as shown. When the
body dries, take a pencil or dowel and curl the top layer of the wings around
it. This will lift the wings and also show the sparkle details.

have fun foam you can cut the wording out several times on white cardstock and
glue them together to form the base and attach the top layer with your choice
of color paper. I used fun foam and cut out the words, “Thinking of you” from
CottageCutz Thinking of You set. I cut a set out of pink cardstock and added
some Wink of Stella again, to add some sparkle and make it coordinate with the
butterfly.

Now that the main piece is dry, take some coordinating washi
tape and add some strips down the front of the card as shown. This adds more dimension
without adding bulk. ( If you do not have washi tape tear some strips of
decorative paper and attach. Use what you have on hand. If you want you can add
ribbon, twine, or leave it blank)

Assemble the components as shown in the picture. Attach the
white painted cardstock to your base layer. Layer the butterfly circle piece you created
with dimensional squares to give more drama. Attach the “Thinking of you”
embellishment with your liquid adhesive. Then you are finished. If you would
like more “sparkle” as I did, add some colored sequence randomly around the
card.
with dimensional squares to give more drama. Attach the “Thinking of you”
embellishment with your liquid adhesive. Then you are finished. If you would
like more “sparkle” as I did, add some colored sequence randomly around the
card.