Showing posts with label die cut machine. Show all posts

Monday, May 6, 2019

Spring Has Sprung Paper Collection with Miss Kate Cuttables

I was out of birthday cards. I hate to not have my stash of cards ready for when a holiday strikes!! So, off to my craft room to make some. I decided to make a quick "print then cut" version of birthday cards. These cards were done in a jiffy!!


Before we get into the project, go over to Miss Kate Cuttables to pick up your "Daily Freebie".


First, I brought in my file to my Silhouette Cameo 3 program and printed off 4 BIRTHDAY GIRL TITLES. I then placed the paper onto my cutting mat and cut around them using my trace feature. After cutting I made some A2 card bases in various colors of card stock and used adhesive foam squares to pop up my sentiment.


This is the cut file from my computer screen after I traced the "Happy Birthday" with the trace feature.


This is the paper I printed from my printer. This is the "Print" part of the "Print then Cut" method. 


I added my printed paper onto my cutting mat and used the cut file above to cut my sentiments out. This is the "Cut" part of the "Print then Cut" method.


I added some Wink of Stella to the balloons and the hearts as well as to the birthday candle and I was finished with these cards!!


I thought about how cute this would be for a gift set for someone so I also made a card box holder in case I need a quick little "thank you" gift for someone.


 I like to give little gifts when I go visiting or when someone visits me. They are also great for hostess gifts when you to go a party, birthday gifts for people you don't usually buy for or even for someone who is under the weather for a "pick me up"!! You can find the directions for the box HERE. I added a belly band by cutting a strip of 12 inch paper to 1.25 inches and taped it over my box to keep the flap shut. If you have some prepositional tape or glue you can use that on the flap as well.


As you can see, making these is fast and fun. They yield a great reward when you share them too!!
Give the "Print and Cut" method a try and use other files from Miss Kate Cuttables to make every holiday special by giving out boxed cards!!


Thanks for joining me! Please take some time to check out some of my other posts with more inspirational ideas and join my newsletter so you will get all the new posts sent directly to your email!!

Happy Crafting!

Thursday, March 21, 2019

Birthday Card with Miss Kate Cuttables and Mickey!

I am making a quick pop up card with Miss Kate Cuttables. I decided on making a mouse card for someone who loves going to Disney. I love the simple pop up element I used in this card.


Before we get into the instructions on making this card, click HERE to get your daily freebie at Miss Kate Cuttables!!


I used a couple of Miss Kate files: Mouse Uppercase Alphabet and Mouse Balloons.

I did a print and cut with the Mouse Balloons and cut out several balloons. I then went to THIS website to make my pop up element. I used a normal A2card base and inserted the pop up element in the center. I then covered the panels of the inside of the card with some yellow mouse paper I took out of a Disney scrapbooking pack.


I added the balloons I cut out to the pop up element and then went back to my Cameo 3 to cut some letters. I used the Mouse Uppercase Alphabet to type out "Happy Birthday". I then added the sentiment to the inside of my card.


I then use some more goodies from my Disney scrapbooking pack and decorated the front of my card and I was done!! Thanks for stopping by!!


Don't forget to drop by blog for more ideas and sign up for my newsletter to get the latest posts as they are posted!

Monday, January 11, 2016

CHEERS!

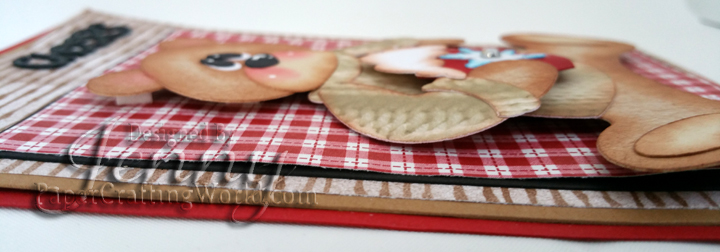
Today's sweet bear is a cut file from Paper Crafting World, Bear Holding Hot Chocolate. He is a very easy file to cut out and assemble. It is a great card for a winter birthday or just a wintery hello!

 
 Let's make the card!

1. Open the file and adjust the bear to measure 4.25 inches. My card is 4.5 x 6.5. It fits into an A7 envelope without any extra shipping.
2. Cut the bear pieces out in desired colors.
3. Shade each cut piece with ink. I used Memento Dew Drops.


4. Assemble the bear. I used dimensional glue dots on the cup. Add some dots of white paint to check and eyes for high lights. I also added a rhinestone to the snowflake for some added bling.


5. For the papers: Red base is 4 1/2 x 6 1/2; Brown 4 1/4 x 6 1/4; Decorative Brown Stripe 4 x 6;
 Black 3 5/16 th x 4 13/16 th; Decorative Red Plaid 4 1/4 x 6 1/4.
6. Layer all the papers and adhere with tape and use dimensional pads to pop the bear up off the mat.
7. For the word, "cheers" I use the Sizzix Thinklits Drop-Ins.  I cut off the word HOLIDAY and just used CHEERS. Attach it to the top right of your card.
8. You can use anything to decorate your card front. I used some faux enamel dots I made from melting some Perler beads.