Showing posts with label wall decor. Show all posts

Thursday, April 18, 2019

Easter Wreath with Miss Kate Cuttables

Hi!! I am going to show you how to make a fun Easter decoration on your die cutting machine using Miss Kate Cuttables Easter Wreath SVG.

Before we get into the project, go over to Miss Kate Cuttables to pick up your "Daily Freebie". This Easter wreath was a daily freebie and is now a discounted file.


I cut out my design using the "Easter Wreath" svg making it as large as I could using my Silhouette Studio. I cut out each layer using the coordinating color. The file you will receive from MKC will have a color coded image either all together or with all the pieces of the project apart. I usually use the one together so I know how the pieces go when I go to put it back together.

After I cut out all my pieces I glued them together. (I used the Miss Kate Cuttables Mat and Blades.) You can be done at this point!! It is easy to make beautiful items by simply cutting and assembling. But, with this project I went a step further and decorated all my Easter eggs and the leaves of my wreath with GLITTER and BLING!! You can use solid papers to decorate the eggs or pattered paper and leave them as they are cut. I used my patterned paper and many glitter glues and rhinestones to jazz up my wreath.
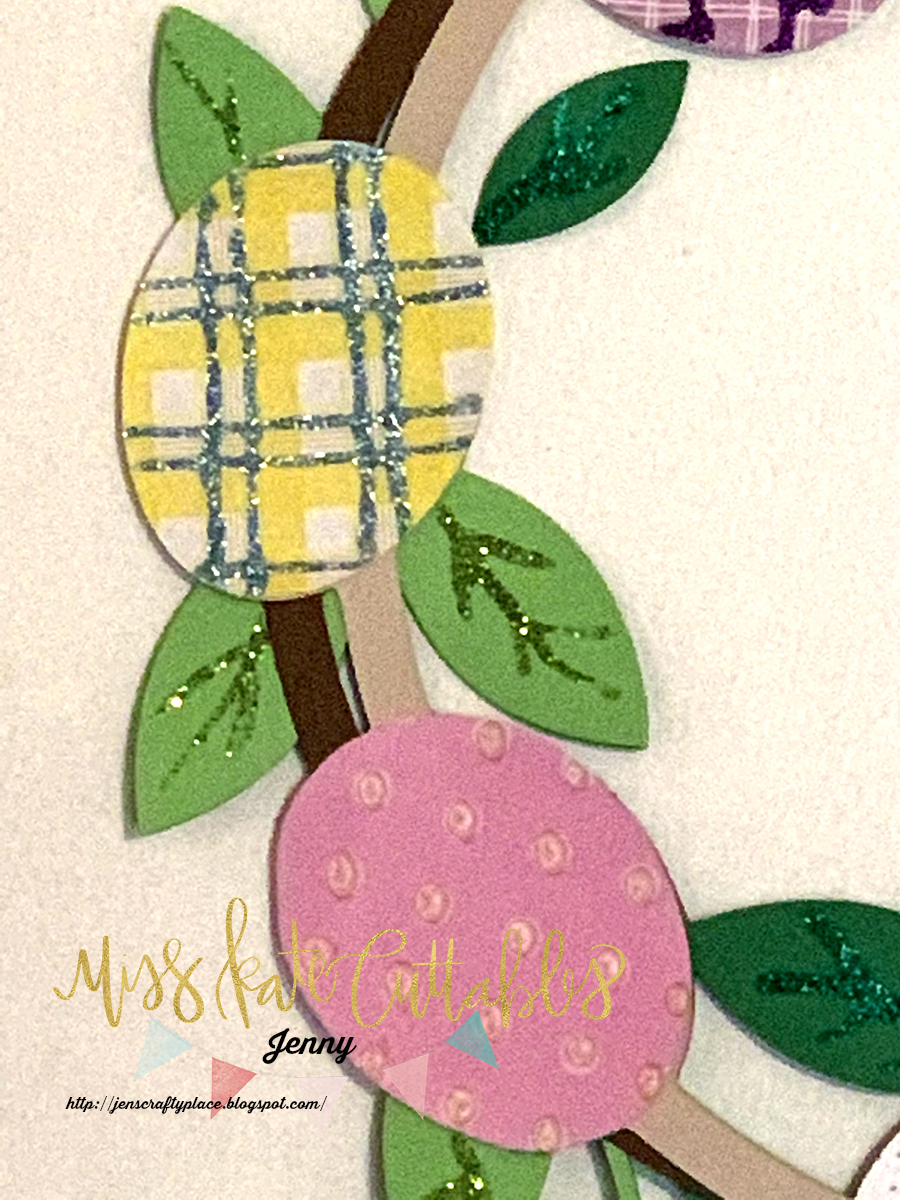


I like to get my fingers dirty sometimes!! This is also a great project to do with children. Let them decorate the eggs and then glue them to the wreath for a special memorial wreath. Let each child write their name on an egg, or have them put what they are thankful for. There are many ways to use this wall hanging. Use your imagination and have fun creating!! Don't forget to post pics in the comments below to show off your designs!!


Thanks for joining me! Please take some time to check out some of my other posts with more inspirational ideas and join my newsletter so you will get all the new posts sent directly to your email!!

Happy Crafting!
Monday, February 11, 2019

Mardi Gras and Miss Kate Cuttables

Today I have a fun decoration for Mardi Gras!! It is the monthly challenge for Miss Kate Cuttables. I have to admit, this one was a thinker!! Miss Kate Cuttables currently does not have a Mardi Gras selection but taking some items from a few sets I came up with this goodie; I hope you like it!!


Before we get into the project, click HERE to get the daily freebie over at Miss Kate Cuttables.


This hat is cut from the "Windy Snowman" file. Make your hat as large or small as you like. I made the image of the hat fit on a 12 x12 sheet of purple cardstock. I cut the hat band out of green cardstock and then moved on to the embellishments.


I couldn't find a fleur de lis so I used a "Flourish Accent". I cut it out of yellow cardstock and then used some glue to spread over the item and then added some gold glitter. This is messy but Ilove the look and it adds the shinny element that makes this decor scream, MARDI GRAS!!


I did some research into Mardi Gras and found a strong tie with skull and bones. So, I incorporated a fun "Skull and Crossbones" set that I thought was cute.  I cut them out of some bone cardstock and added some shadows with some grey and black to make it complete.


Cutting the feathers was a challenge because Miss Kate has many to choose from. I finally decided on this "Feather Set". I loved the two tones in them and the white tops!! I used various shades of purple, yellow and green cardstock. I also cut the beads from "Pile of Presents-Boy" using the same colors as the feathers.  I took the balloons middle layer to make my "beads". You can chose to use the white highlights if you want some added layers. I chose not to.


I then glued all my embellishments to my main hat piece and back the whole thing with some strong cardboard and added a hanger and I was finished!!


Don't forget to sign up for my newsletter to get the latest posts as they are posted!