Showing posts with label happy birthday. Show all posts

Sunday, July 16, 2017

Soccer Boy Birthday Card by Crafter's Companion


This adorable little soccer boy is from Crafter's Companion. He has since retired but there are many other wonderful images still available. I colored him with Spectrum Noir alcohol markers also from Crafter's Companion. The card base itself is a kinetic card called Circle Center from the Create-A-Card series from Die'sire. These are also from Crafter's Companion.

With this Circle Center card set, you cut out the navy card with the base swing circle. (Follow instructions on package) Next, stamp your image on appropriate paper  and color it with your desired medium. Using a circle die, cut the image out to fit the center circle. Attach image with adhesive to the circle on your navy card stock base.


With the second set of dies, included in the Create-A-Card kit, cut out the green card stock. Using a bone folder and either your paper trimmer or scoring pad, score the paper every 1/4 inch creating a little bit of dimension. (You may also use an embossing folder of your choice.) If you have any ribbon you would like to add, attach to the right panel of the green card stock before you apply to the navy card base. This way you can attach the ribbon to the back of the green card so it won't show when the card is flipped over. Next, attach the green card stock panels to the navy blue base with adhesive.


Stamp a sentiment on card stock and cut with either hand punches, oval dies or hand cut around the wording. Add a navy mat around the stamped shape. I used a stitched oval die and my Gemini to cut mine out. Attach with adhesive and the card is complete!! (I added a few faux enamel dots to the center to pull al the colors together and also balance out the left side with the right side.)

This Create-A-Card die is perfect for making quick and easy cards that have a lot of WOW power!

Happy Crafting!!
Jen

Tuesday, January 19, 2016

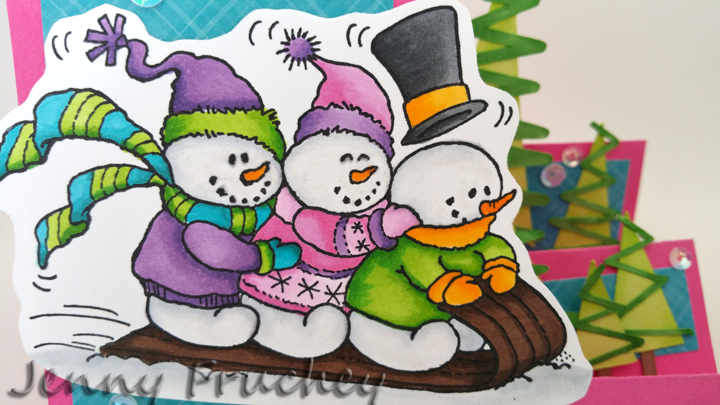
Sledding Fun!


This colorful card will brighten up anyone's day! I have a sentiment for Christmas but you can add "Let It Snow" to the bottom for a fun, winter "pick me up" card!

I stamped the playful snowman image from Stampendous Impressions on Copic friendly paper.  (Not sure of the name but the code was CRP234. If you can't find this exact stamp set, use another snowman image.)  My paper was Neenah solar white cardstock and I used Memento Tuxedo Black ink which is also Copic friendly. Stamp your image and color it. Cut the design out leaving a small border around the image.


For the card base there are several options. I used a Sizzix die for my base and background papers. You can also use a Silhouette cut file from Lori Whitlock. Both options will give you the same result. Cut out a base in desired color using cardstock. Then cut liner papers that coordinate with your base paper. I used pink cardstock and a bright blue for my base papers. Scrap paper works great for these pieces! Attach papers to base after they are cut out and add your main image to front of card as shown.


To add interest to the side, I cut out some triangle scribble trees in various sizes from the Silhouette Design Store. They vary in size from 1 inch to 3.5 inches tall. (Including stumps)
Add the trees to the side steps in a staggering fashion. I used some dimensional foam squares to pop up some of the trees to add some extra dimension.


Cut a sentiment out of cardstock using your die cutting machine and your favorite font or use a die. I used "Merry Christmas" die from Lawn Fawn. Like I said above, if you want to use this as a winter card you can use "Let It Snow" from Lawn Fawn or any other sentiment you would like. You could even stamp one! This would make a great birthday card also by using "Happy Birthday" by Lawn Fawn. I love Lawn Fawns dies! (as if you couldn't tell....)

You could be done at this point or go the extra mile, like I did, and add some sequins!

STAY WARM MY FRIENDS!!

Friday, August 28, 2015

From the Heart Stamps


This is my submission to From the Heart Stamps design team call.
I used a sketch from their blog and their freebie digital image, Mouse Balloon.
I water colored the  mouse with distress inks and used my quickutz nesting circles to cut all the circles. The paper is American Crafts birthday 6x6 pad.
For added fun, you could add glossy accents to the balloon!